What it does
Tapeloop records your microphone and your Mac's sound all the time, like an endless tape loop. It keeps only the most recent part, two hours by default, and drops older audio as new audio arrives. When something worth keeping has already happened, such as a promise in a call, a lecturer's aside or an idea you said out loud, you rewind and save it.
- Two sources. "You" is your microphone. "System" is everything your Mac plays, for example the other side of a video call.
- In memory. The audio is compressed and held in memory: about 22 MB per hour per source at the standard quality, so two hours of both sources need about 89 MB. Nothing is written to disk until you save.
- Gone when you quit. Quitting, restarting or a crash erases what was not saved. Nothing is kept that you did not choose to keep.
- Ordinary files. A save is an
.m4afile in Music › Tapeloop that any audio player can open.
Recording other people may require their consent where you live. Check the rules that apply to you before you record calls or meetings.
Install and first run
- Download
Tapeloop-0.1.0.dmgfrom the Releases page, open it, and drag Tapeloop to Applications. - Open Tapeloop. The first time, macOS blocks it because this version is not notarized by Apple. On macOS 14, right-click Tapeloop in Applications, choose Open, then Open again. On macOS 15 or later, try to open it once, then click Open Anyway in System Settings › Privacy & Security.
- A five-step welcome guide opens and asks for the permissions from its own window.
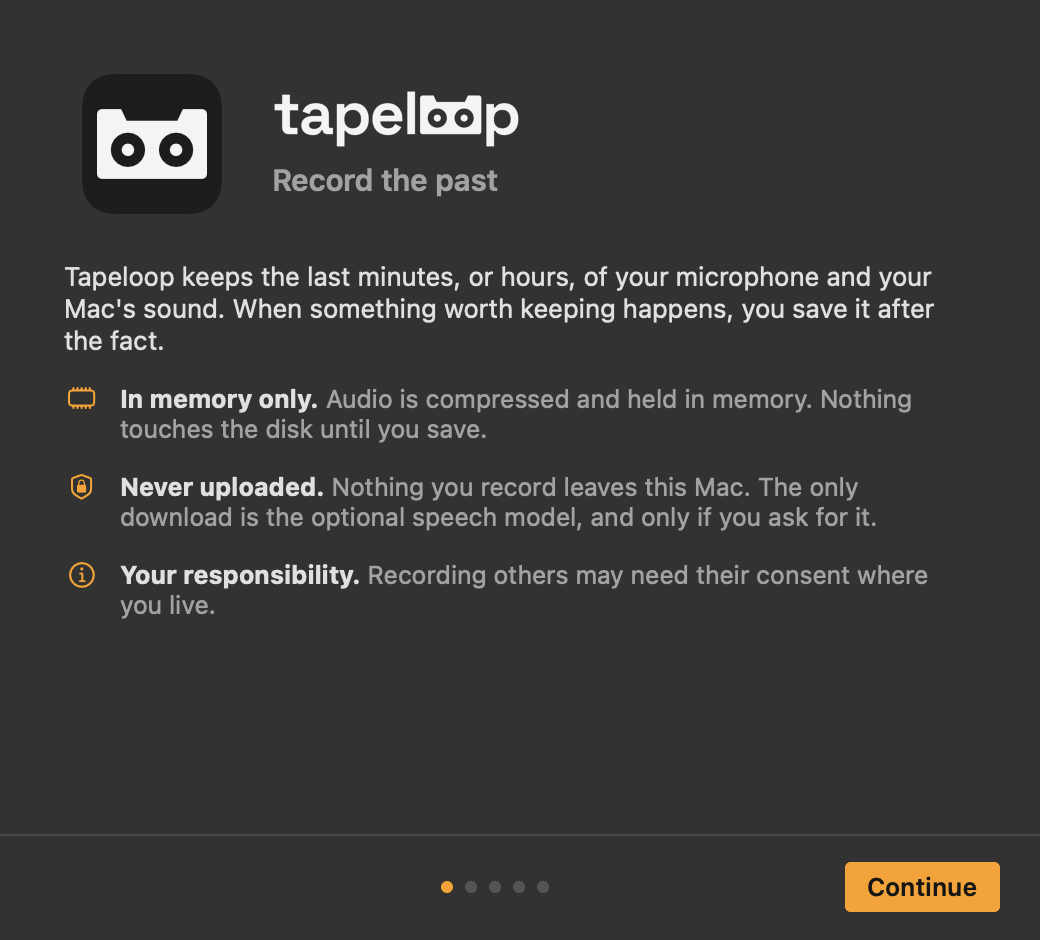
| Step | What happens |
|---|---|
| 1. Welcome | What Tapeloop keeps, and its promises: in memory only, never uploaded, your responsibility. |
| 2. Your microphone | Click Allow…; macOS asks for the Microphone permission. |
| 3. Your Mac's sound | Click Allow…; macOS asks for System Audio Recording. You can skip this and record only the microphone. Screen Recording is not needed. |
| 4. Optional extras | Calendar (to name recordings after meetings), a Download button for the speech model used for transcripts, and meeting detection. Nothing is downloaded unless you click Download. |
| 5. You are all set | The global shortcuts and "Open Tapeloop when I log in". Click Done to start recording. |
Until you finish the guide, clicking the cassette in the menu bar brings it back to the front. You can open it again from Settings › General › Show Welcome Guide Again. While the guide, Settings or the Library is open, Tapeloop also appears in the Dock and the app switcher.
The menu bar icon and the popover
Tapeloop lives in the menu bar as a small cassette. The dot in its corner shows what it is doing.
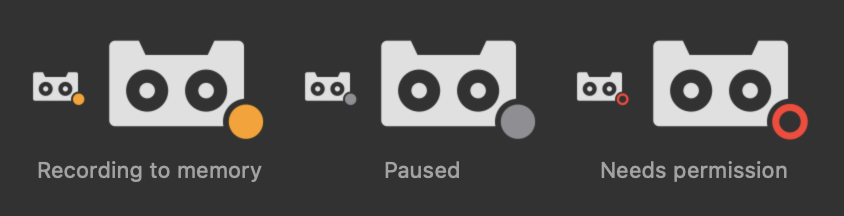
Click the icon to open the popover. Right-click it for a menu with quick saves, Bookmark Moment, Pause, Library, Settings and Quit.
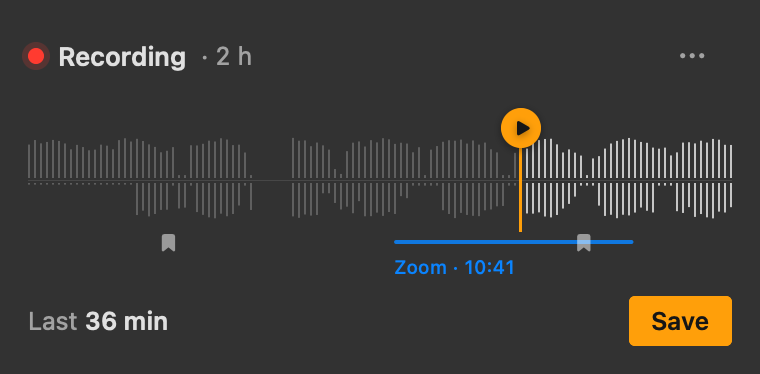
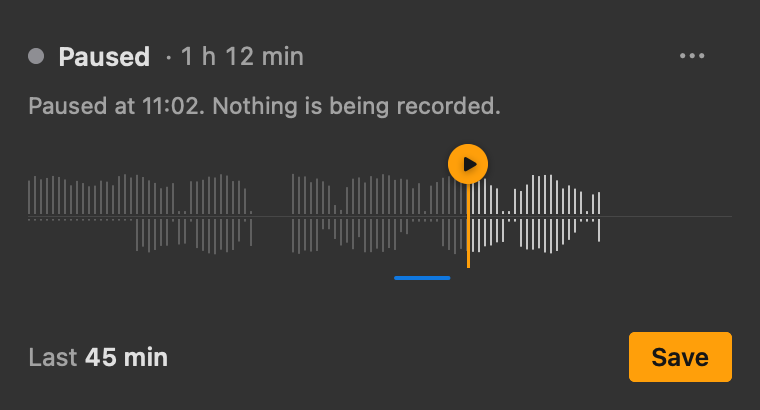
- Top line: a red dot while recording (grey when paused), and how much is kept ("2 h"). The ••• button holds Pause, Bookmark, quick spans (the last 5, 15 or 30 minutes or the last hour), Library and Settings.
- Tape: your voice rises above the centre line and your Mac's sound hangs below it. The span to the right of the handle, the part a save keeps, is drawn brighter.
- Under the tape: bookmark icons, and a blue line for each meeting with its name below it.
- Bottom line: the span a save keeps ("Last 36 min") and Save.
Saving
From the popover
Drag the amber handle to the left, or choose a quick span from the ••• menu. Drag it all the way left to save everything kept. Then click Save or press Return. A long save shows its progress with Cancel; when it is done, a notification offers Play and Show in Finder.
Listen before you save
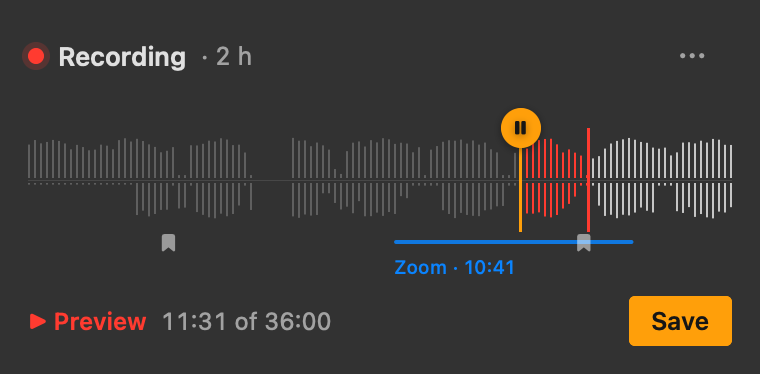
Click the play button on top of the handle to hear the span from the handle onwards, without saving anything. The part already played turns red and the bottom line shows the position. Click again to stop; moving the handle or closing the popover stops it too. Drag the play button to move the handle.
From anywhere
Press ⌃⌥S to save the last 5 minutes (change the length and keys in Settings › Shortcuts), or right-click the icon and choose Save Last 5, 15 or 30 Minutes or Save Last Hour.
Files
Recordings go to Music › Tapeloop unless you choose another folder in Settings › General. A file is named after its start, length and meeting, for example Tapeloop 2026-11-17 10.48 (36 min) Weekly sync.m4a, and never overwrites another. With both sources on, choose One mixed file or One file per source. Saving copies the compressed audio without re-encoding, so even hours take about a second.
Before you quit
Quitting erases what Tapeloop keeps. If it holds more than a minute, Tapeloop asks first and offers to save the last part before quitting.
Bookmarks
A bookmark marks a moment so you can find it later. Choose Bookmark This Moment from the popover's ••• menu and type an optional label, press ⌃⌥B in any app, or choose Bookmark Moment from the right-click menu. Bookmarks show as small bookmark icons under the tape, travel with a save, and let the Library's player jump to them.
Pausing and gaps
Choose Pause Recording from the ••• menu, press ⌃⌥P, or use the right-click menu. What Tapeloop already keeps stays; nothing new is recorded until you resume. Tapeloop always pauses while the Mac sleeps, and can pause while the screen is locked (Settings › Recording). A pause shows as a break in the tape, and a save across it skips the silent time.
Meetings and your calendar
Tapeloop notices calls without any permission. When a known call app has used your microphone for about 5 seconds, a meeting starts: a blue line with the app's name appears under the tape, and the popover offers Save meeting. It ends about 10 seconds after the app stops using the microphone, so a short mute does not split it. When a meeting of at least a minute ends, a notification offers to save it, or Tapeloop can save every meeting automatically (Settings › Meetings).
Recognised apps: Zoom, Microsoft Teams, FaceTime, Slack huddles, Webex, Discord, Skype, WhatsApp, Telegram, Signal, and calls in Chrome, Safari, Arc, Firefox, Edge and Brave (for example Google Meet). Meeting detection needs macOS 14.2 or later.
Calendar titles (optional): turn on Use calendar event titles in Settings › Meetings and allow access to your calendars. Meetings and recordings are then named after the event they overlap most.
The Library
Open the Library from the popover's ••• menu, the right-click menu, or ⌘L while a Tapeloop window is open.
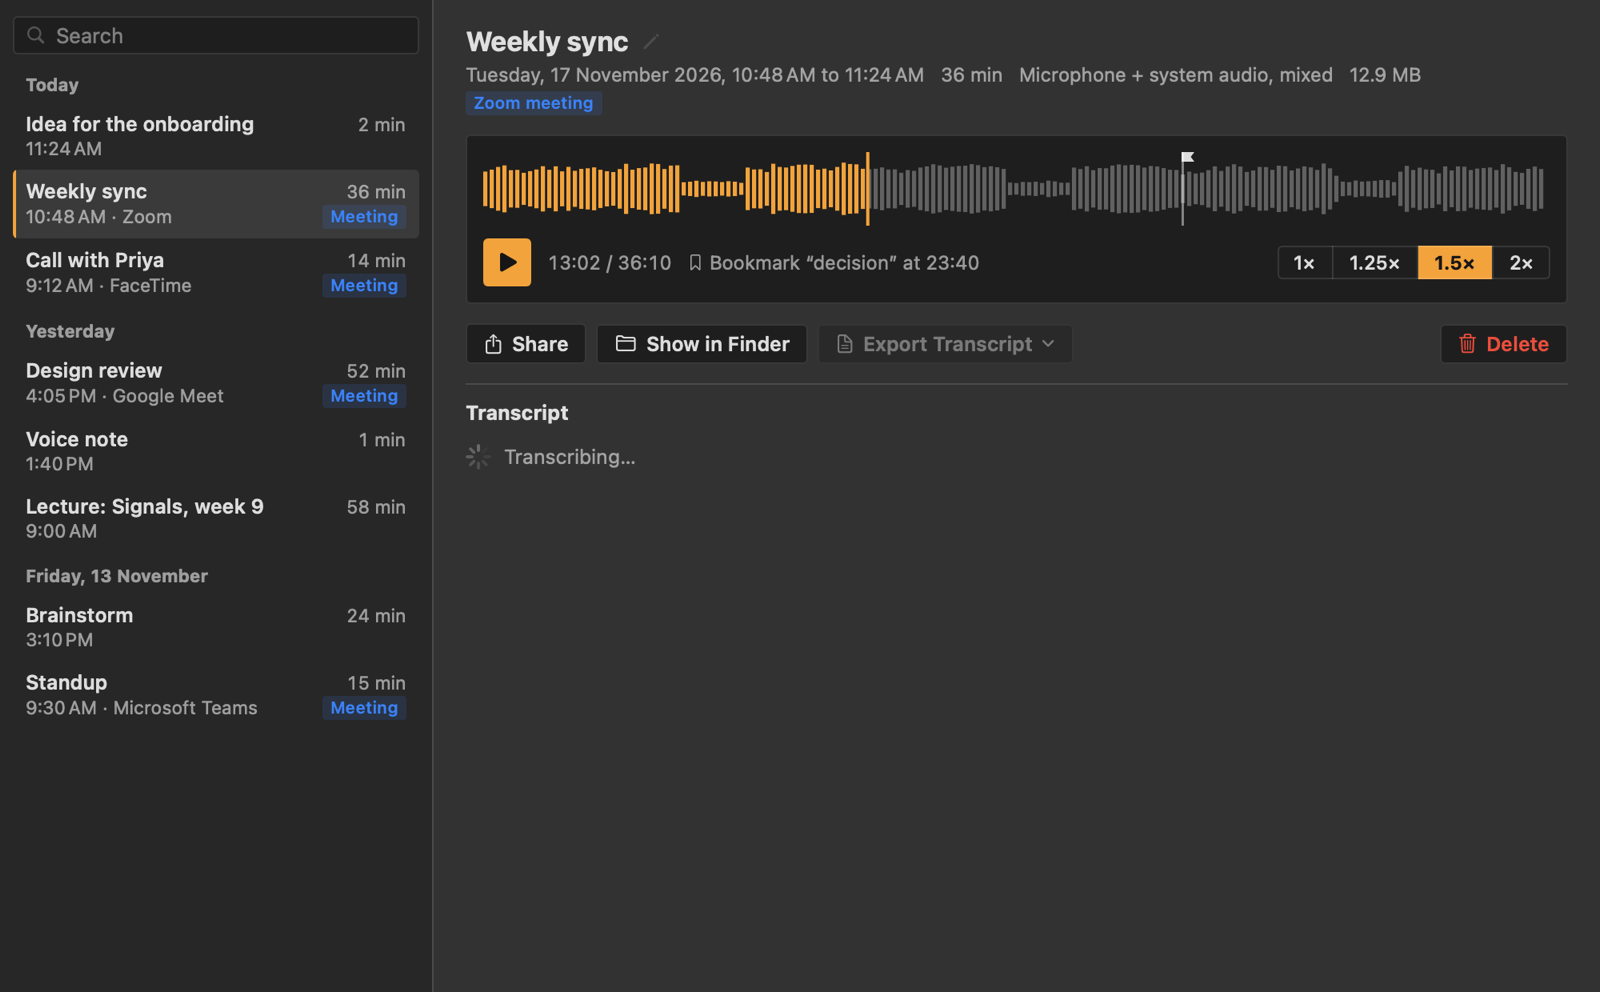
- List: recordings grouped by day, newest first, with their length and a Meeting tag.
- Search: by name, meeting app, calendar title, bookmark label or any word in a transcript.
- Player: click the waveform to jump, Space to play or pause, jump to bookmarks, and play at 1× to 2×.
- Rename, Share, Show in Finder, Delete (to the Trash, after asking).
The Library shows every .m4a in your save folder, including files you put there yourself, and follows changes made in Finder.
Transcripts
Tapeloop can turn recordings into text on your Mac. The audio is never sent anywhere. Choose the engine in Settings › Transcripts:
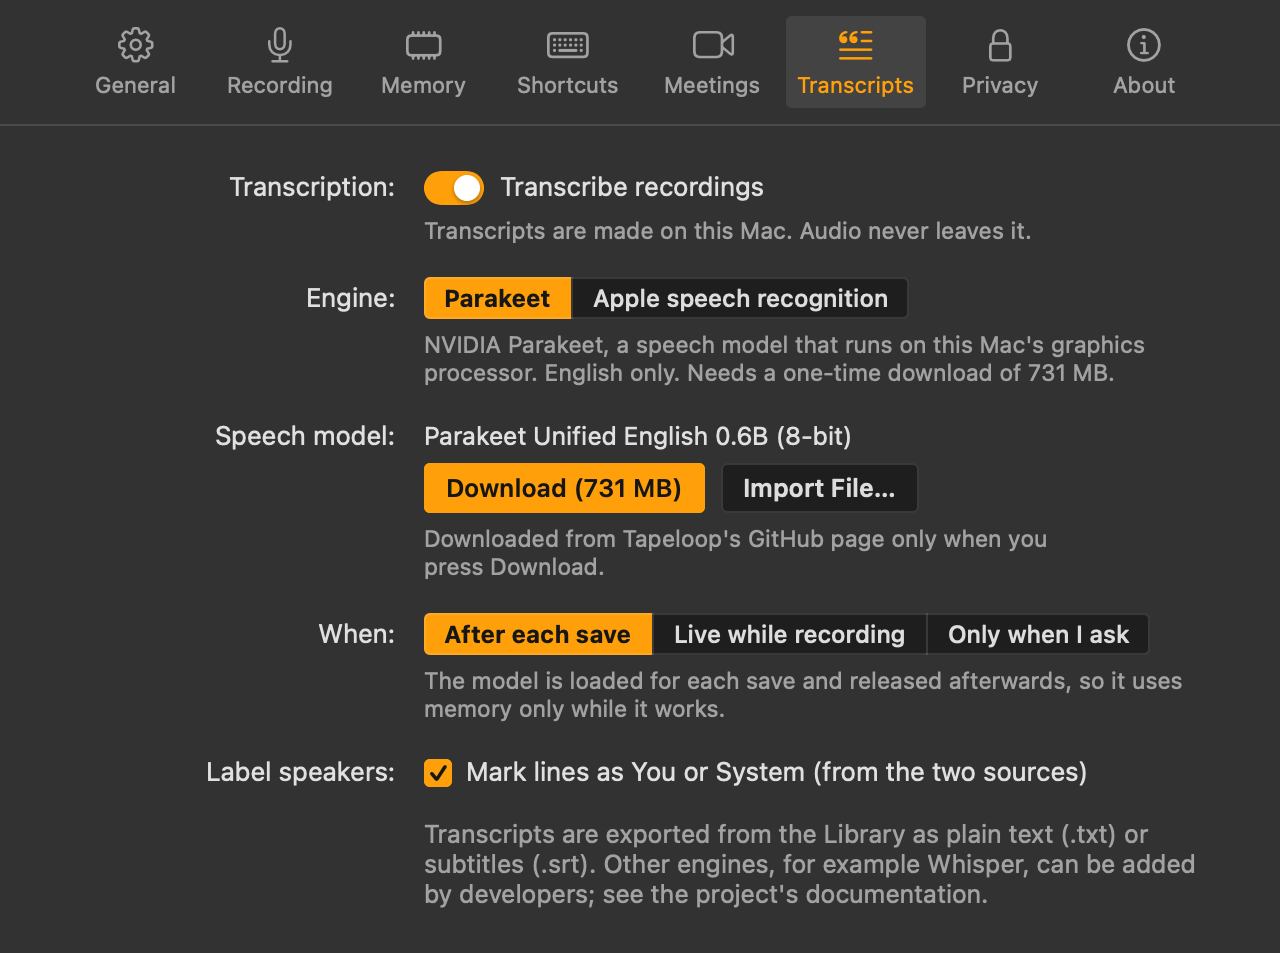
- Parakeet (default): NVIDIA's Parakeet model, run on your Mac's graphics processor. English only; a one-time 731 MB download.
- Apple speech recognition: built into macOS. Many languages; needs the Speech Recognition permission; downloads nothing. Only languages your Mac recognises offline are offered.
Getting the speech model
Nothing is downloaded until you ask. Click Download in step 4 of the welcome guide or in Settings › Transcripts. The file comes from Tapeloop's own GitHub release and is used only if it is exactly the expected file (its SHA-256 is checked). Already have it? Use Import File… with parakeet-unified-en-0.6b-Q8_0.gguf.
When to transcribe
| Choice | What happens |
|---|---|
| After each save (default) | Each recording is transcribed right after it is saved. The model is loaded for the job and released afterwards. On an M2, 43 seconds of speech takes about 11 to 14 seconds. |
| Live while recording | Parakeet only. Audio is transcribed as it records, so a save has its transcript at once. The model stays loaded while Tapeloop records. |
| Only when I ask | Open a recording in the Library and click Transcribe. |
With Label speakers on, lines are marked You or System. Export a transcript as plain text (.txt) or subtitles (.srt).
Settings
Open Settings from the popover's ••• menu, the right-click menu, or ⌘,. Changes take effect at once.
| Tab | What you can set |
|---|---|
| General | Open at login; the save folder; one mixed file or one per source; the warning when quitting; the welcome guide. |
| Recording | Microphone and system audio on or off; which microphone; level meters; quality (32, 48, 64 or 96 kbps per source); pause while locked. |
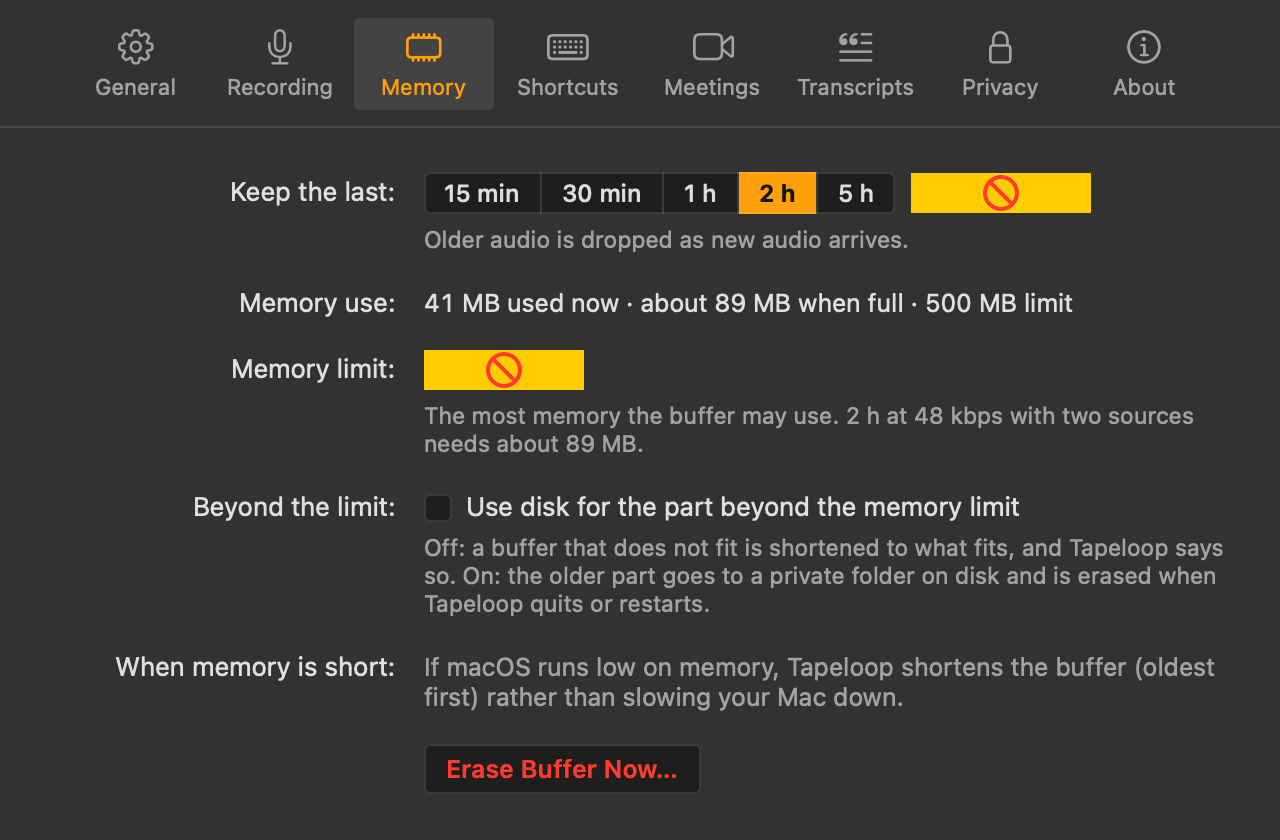
| Memory | How much to keep (15 min to 5 h, or 10 min to 12 h custom); memory used; the memory limit (100 MB to 2 GB, 500 MB default); disk beyond the limit; Erase Buffer Now. |
| Shortcuts | The four global shortcuts. |
| Meetings | Detection; offer or automatic save; blue bands; calendar titles and calendars. |
| Transcripts | On or off; engine; the speech model; when to transcribe; language (Apple only); speaker labels. |
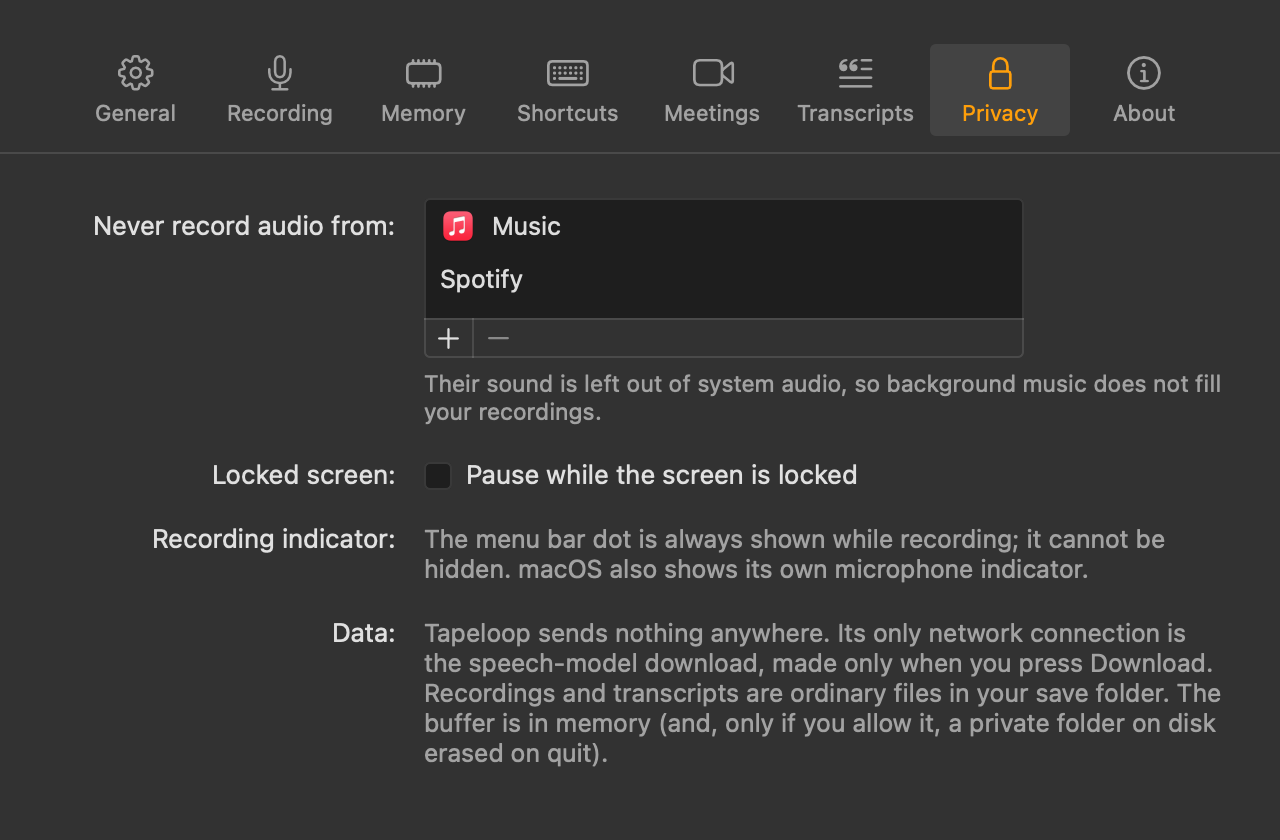
| Privacy | Apps whose sound is never recorded; pause while locked; what Tapeloop stores. |
| About | Version, links, licence and third-party notices. |
Memory and disk
If the length you choose does not fit the memory limit, Tapeloop asks whether to keep the older part on disk or keep only what fits. The disk part lives in a private folder that is erased when Tapeloop quits and starts. If macOS runs low on memory, Tapeloop shortens the buffer, oldest audio first, instead of slowing your Mac down.
Shortcuts
| Keys | Action |
|---|---|
| ⌃⌥S | Save the last 5 minutes (length 1 to 60 minutes) |
| ⌃⌥B | Bookmark this moment |
| ⌃⌥P | Pause or resume |
| not set | Open the popover |
Change them in Settings › Shortcuts: click one and press new keys, Escape to cancel, Delete to clear. They work in every app and need no Accessibility permission.
Privacy
- Nothing leaves your Mac. No account, no analytics, no update check. Audio, recordings and transcripts are never uploaded.
- One download, only when you ask. The only network connection is the speech-model download, made when you click Download. The project's build fails if network code appears anywhere else.
- Memory first. Nothing is written to disk until you save, unless you allow disk for long buffers; that folder is erased on quit.
- Plain files. Recordings are ordinary audio files. Titles, bookmarks and transcripts sit in a hidden
.tapeloopfolder next to them. - Leave apps out. In Settings › Privacy, add apps such as Music or Spotify under "Never record audio from".
- Always visible. The menu bar icon shows when Tapeloop records, and macOS shows its microphone indicator.
Troubleshooting
- The icon has a red ring, or the popover says the microphone is not recorded.
- Tapeloop lacks the Microphone permission. Click Open System Settings in the popover, or turn Tapeloop on in System Settings › Privacy & Security › Microphone.
- Saved files have no sound from the other side of a call.
- Tapeloop probably lacks System Audio Recording. Turn it on in System Settings › Privacy & Security › Screen & System Audio Recording, under "System Audio Recording Only". macOS gives silence rather than an error when this is off. Also check Settings › Privacy › "Never record audio from".
- macOS asks for the permissions again after an update.
- This version is not signed with an Apple Developer ID, so macOS treats each update as a new app. Allow the permissions again. If a switch is already on but recording fails, turn it off and on again and reopen Tapeloop.
- "Nothing to save yet".
- There is no audio in the span you asked for: right after starting, after a pause, or with both sources off.
- A shortcut does nothing.
- Another app probably uses the same keys. Settings › Shortcuts says so; choose different keys.
- A call was not detected.
- Check that detection is on and that your Mac runs macOS 14.2 or later. The app must be a recognised one and use the microphone for at least 5 seconds. You can always save the span by hand.
- A recording got no transcript, or the model download fails.
- In Settings › Transcripts, transcription must be on and When must not be "Only when I ask"; with Parakeet the model row must say Installed. If the download fails, click Try Again, or get the file another way and use Import File….
- "Open Tapeloop when I log in" does not stick.
- Move Tapeloop to Applications, open it from there, and turn the option on again.
Still stuck? Open an issue on GitHub.
For developers
Tapeloop is a Swift 6 package with no dependencies beyond Apple's frameworks and the vendored transcribe.cpp. With Xcode 16 or later:
git clone https://github.com/harshaxnim/tapeloop
cd tapeloop
scripts/dev-signing.sh   # once: rebuilds keep their permissions
make app                 # build/Tapeloop.app
make test                # 137 tests
make dmg                 # build/Tapeloop-0.1.0.dmg
Read the architecture, testing and contributing guides, and the performance report.